Hello. This post
covers the Installation of Microsoft Dynamics NAV 2009 (R2) with Three Tiers.
So there will be 3 computers (Database Server, Application Server & Client
System). One more System I have considered here which will be Active Directory
Domain Controller. All the other 3 Computers are part of this Active Directory
Domain Controller.
Complete
information on prerequisites can be found in below Microsoft MSDN link:
Microsoft Dynamics NAV 2009 System Requirements


Let’s start the installation of NAV Database Components on Database Server.
Run the setup of NAV. Click Microsoft Dynamics NAV under Install.

Click Next to Continue.

Click I accept > to continue.

As we are going to install only Database Components of NAV. Choose an Installation option as shown below:

Click Database Components.

As SQL Server is installed on the same Server (DBSrv.Domain.Com), no need to configuring it. Just click Apply to start the installation.

Installing NAV Components for SQL Server

Click Close to complete the installation of Database Components.

It was easy right? Yes it is. Now the Database components have been installed along with Demo Database of NAV. Let’s move to second tier installation i.e. Application Server.
Run NAV Setup on Application Server (AppSrv.Domain.com). Log in with domain user which has administrator rights to install application.

Click Next >

Click I accept.

Choose option as shown below:

Click Server as shown below to install NAV Application Server.

As can be seen below, we need to configure Server. Click on Server.

Enter the name of Database Server where Database Components are installed. In this case it is DBSrv. Click Apply.

Now Server is configured, you can click Apply to start the installation.

Installation is in progress.

Click Close to complete the installation.

Database Components have been installed on Database Server (DBSrv) and Application Server is installed on Application Server (AppSrv). We are left with Client installation (RoleTailored Client and Classic Client) on our third computer which is loaded with Windows 8.
Before installing client we need to make some configurations. Our SQL Server Service is running with Local System Account and we will use dedicated Domain User account to run the NAV Services.
So Let us create a Domain User account which will be used to run NAV Services on Application Server Tier. So I created a User named DOMAIN\NAV2009. You can use anything you like to use.

Provide Password and make sure you select the checkboxes as shown below. Click Next.

Review details and Click Finish to complete the user creation.

Open Services from Administration Tools or use Run Command and enter Services.msc to start the window showing services running on the server. As you can see below by default NAV Server Service and NAV Business Web Services are installed with Network Service Account.

Open Microsoft Dynamics NAV Server service by double clicking. Move to Log On Tab as shown below and click Browse to select the domain account which we have created above.

Click OK after selecting the account.

Enter Password for NAV2009 Account (same as NAV2009 User Password). Click OK.

So we need to restart the Service to take effect of new log on account.

Do the same for NAV Business Web Services service as shown below:

Now when we try to start the service, you may encounter following error message and it will not allow starting the service.

If you see in Event Viewer, You will see the below error which shows that due to lack of permissions to Domain\NAV2009 account, this user account is not able to start the service.

To resolve this issue, On NAV Application Server (AppSrv) open Server Manager, Expand Configuration and then Local Users and Group. Click on Groups and open Administrators group. Add DOMAIN\NAV2009 account to the Local Administrators group to give full permission on the Server. Click OK

Now try to start the Services and guess what it worked. You will be able to start the services with Domain User Account as shown below:

Now there will be some configurations we need to perform to ease the connectivity of Client (RTC) with NAV Server and NAV Server to Database Server.
Update for Microsoft Dynamics NAV 2009 R2.exe - This is the update which works fine with Microsoft Dynamics NAV 2009 R2.

First Extract Best Practices Analyzer for Microsoft Dynamics NAV 2009.exe and run the installer file.

Accept the License Agreement Terms and click Install.

Click Finish to complete the installation.

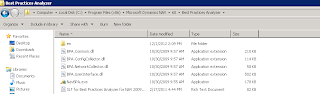
Now Extract Update for Microsoft Dynamics NAV 2009 R2.exe, select all and copy.

And Paste in the location shown below. Replace all files and folders when prompted.
Now open Microsoft Dynamics NAV 2009 Best Practice Analyzer.

Click Select option for a new Scan.

Enter the identifying label for this scan. You can enter anything in this. Active Directory Server name will come automatically and leave ServerInstanceName blank if you have only one Instance of NAV Server installed. Click Start Scanning.

Scanning may take some time depending on System performance. Click View a report of this Best Practices Scan.

Aha, we have some critical issues identified by Best Practice Analyzer. Now we will resolve each of them step by step

Let’s look at the below one first. It says Service Account (which is Domain\NAV2009 in our case) is not a database user. So to resolve this issue we need to configure Object Change Listener (OCL) on NAV Service Tier. OCL is the portion of NAV Service Tier service that checks the database for changes in database objects and make sure that Service Tier has all the updated objects to run. If you do not configure OCL then you may face following error while running RTC.

So let’s resolve below issue.

Go to Database Server (DBSrv) and open SQL Server Management Studio. Now run the following query (Make changes as per your environment):
USE MASTER
CREATE LOGIN [Domain\NAV2009] FROM WINDOWS;
GO

Select and execute following query:

CREATE SCHEMA [$ndo$navlistener] AUTHORIZATION [Domain\NAV2009];
GO

Select and execute following query:
GO

This was easy!! Let’s run the Best Practice Analyzer Scan again.
Same Process.

Click to view the scan report.

That one is gone. Great!!

Let’s look at below one, SPN is missing and BPA gives all the information including how to resolve the issue as well.

So we click Tell me more about this issue and how to resolve it.

The above error resembles the below expected SPN. So now we will create these SPN in Active Directory.

So on Active Directory Sever, run Command Prompt as Administrator and run following command. Make changes accordingly.
Change highlighted details as per your environment. Please make sure there is no spelling mistake otherwise it may give troubles later.

It shows SPN has been registered successfully.

Let’s run the scan again and see the result. One more is resolved!! :)

The same way we need to resolve the below issue by registering SPN for Web Services this time.

Let’s see the help again.

This resembles the below one, so let’s register SPN for Web Services.

Run the command as below (make changes as per your environment).

The SPN is registered as shown below:

Let’s run the scan again. Now only 2 Critical issues are left.

Now we need to resolve these Constraint Delegation issues. We did not take it up this issue earlier as Delegation cannot be configured until SPNs are registered (there will not be any Delegation Tab on Domain User Account). So once SPNs are registered, Delegation can be done.


So Let’s resolve above two issues by setting up constraint delegation.
Go to Active Directory Server. Open Active Directory Users and Computers (dsa.msc), and open the [Domain\NAV2009] user properties. Go to Delegation Tab and select as shown below. Click Add.

Click Users or Computers.

Enter the Database Server (DBSrv) and click OK.

Select Service Types as shown below and click OK.

Run the Best Practice Scan again. Now all the critical issues have been resolved. Below shows two warnings.

We have created SPNs for fully qualified domain names of Application Server but we are not sure whether network will resolve the system with NetBios name or DNS. So lets create SPN as shown below:


Let's create SPN as shown below:


Now run again the Best Practice Analyzer again. Finally we have resolved all the issues and warnings and NAV Server is configured with Best Practices provided by Microsoft.

Now we can install NAV RTC & Classic Client on Client System.
Run NAV setup on Client System. Click Microsoft Dynamics NAV to install.

Click Next.

Click I Accept >

Choose as per below:

Click Customize under Client.

Select as per below:

Click RoleTailored Client to configure to connect to Application Server.

Enter NAV Application Server as shown below:


Click Close to complete the client installation.

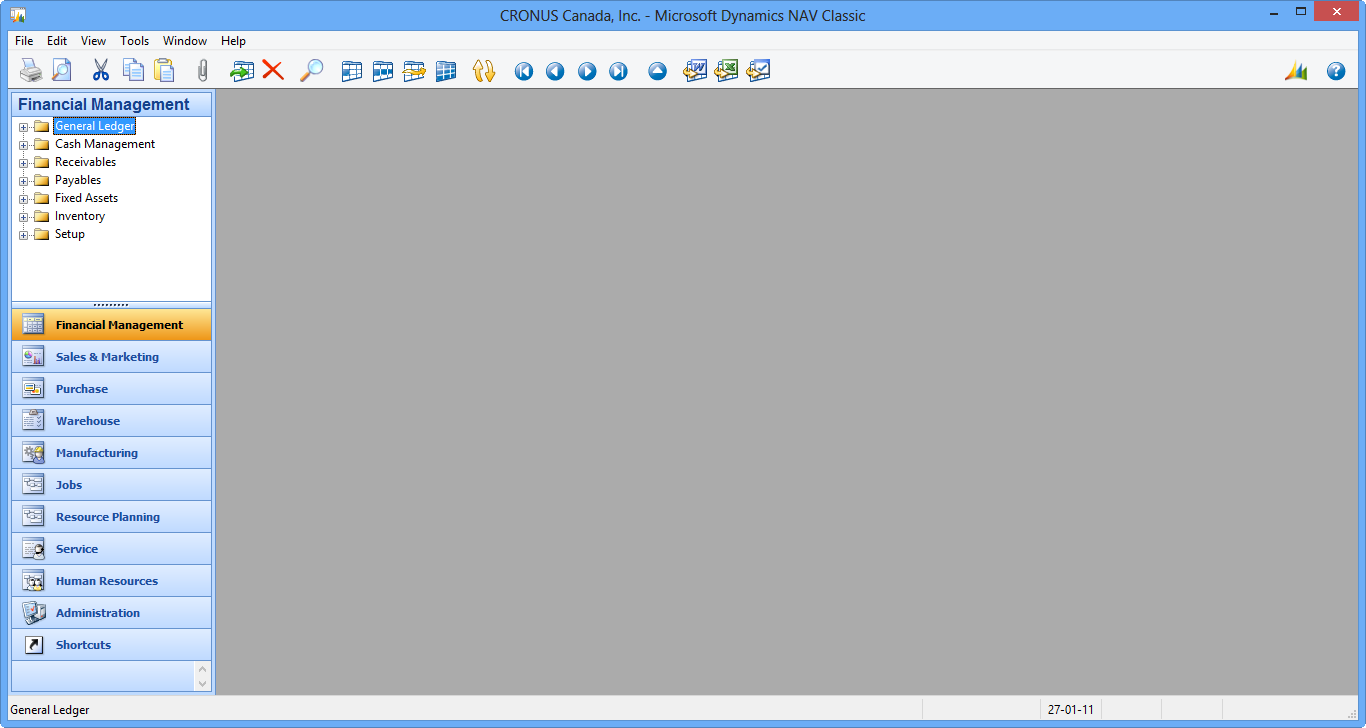
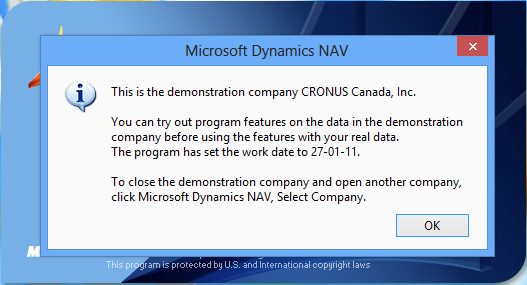
Now open NAV Classic client.

Enter Database Server, select Database and use Windows Authentication to login. Click OK.


Let’s now open RTC


Here we go, RTC is working fine on client system.
Thanks for Reading.
Microsoft Dynamics NAV 2009 System Requirements
So here is
the environment details which I have used for installing Microsoft Dynamics NAV
2009 R2 (All are installed by using domain account login (not by local account
login)):
Once you are
done with Installation of SQL Server 2008 R2 on NAV Database Server (DBSrv),
make sure that SQL Service (MSSQLSERVER or with Instance) is running with the
Local Machine account as shown below:
Let’s start the installation of NAV Database Components on Database Server.
Run the setup of NAV. Click Microsoft Dynamics NAV under Install.

Click Next to Continue.

Click I accept > to continue.

As we are going to install only Database Components of NAV. Choose an Installation option as shown below:

Click Database Components.

As SQL Server is installed on the same Server (DBSrv.Domain.Com), no need to configuring it. Just click Apply to start the installation.

Installing NAV Components for SQL Server

Click Close to complete the installation of Database Components.

It was easy right? Yes it is. Now the Database components have been installed along with Demo Database of NAV. Let’s move to second tier installation i.e. Application Server.
Run NAV Setup on Application Server (AppSrv.Domain.com). Log in with domain user which has administrator rights to install application.

Click Next >

Click I accept.

Choose option as shown below:

Click Server as shown below to install NAV Application Server.

As can be seen below, we need to configure Server. Click on Server.

Enter the name of Database Server where Database Components are installed. In this case it is DBSrv. Click Apply.

Now Server is configured, you can click Apply to start the installation.

Installation is in progress.

Click Close to complete the installation.

Database Components have been installed on Database Server (DBSrv) and Application Server is installed on Application Server (AppSrv). We are left with Client installation (RoleTailored Client and Classic Client) on our third computer which is loaded with Windows 8.
Before installing client we need to make some configurations. Our SQL Server Service is running with Local System Account and we will use dedicated Domain User account to run the NAV Services.
So Let us create a Domain User account which will be used to run NAV Services on Application Server Tier. So I created a User named DOMAIN\NAV2009. You can use anything you like to use.

Provide Password and make sure you select the checkboxes as shown below. Click Next.

Review details and Click Finish to complete the user creation.

Open Services from Administration Tools or use Run Command and enter Services.msc to start the window showing services running on the server. As you can see below by default NAV Server Service and NAV Business Web Services are installed with Network Service Account.
Open Microsoft Dynamics NAV Server service by double clicking. Move to Log On Tab as shown below and click Browse to select the domain account which we have created above.

Click OK after selecting the account.

Enter Password for NAV2009 Account (same as NAV2009 User Password). Click OK.

So we need to restart the Service to take effect of new log on account.

Do the same for NAV Business Web Services service as shown below:
Now when we try to start the service, you may encounter following error message and it will not allow starting the service.

If you see in Event Viewer, You will see the below error which shows that due to lack of permissions to Domain\NAV2009 account, this user account is not able to start the service.

To resolve this issue, On NAV Application Server (AppSrv) open Server Manager, Expand Configuration and then Local Users and Group. Click on Groups and open Administrators group. Add DOMAIN\NAV2009 account to the Local Administrators group to give full permission on the Server. Click OK

Now try to start the Services and guess what it worked. You will be able to start the services with Domain User Account as shown below:
Now there will be some configurations we need to perform to ease the connectivity of Client (RTC) with NAV Server and NAV Server to Database Server.
The main difference related to
database access between Classic Client and RoleTailored Client is that, Classic
Client directly connects to Database Server for database access but RTC
(RoleTailored Client) first connects to Application Server and then Application
Server get required information from Database Server (on Behalf of client),
this process is called Impersonation.
To make this work fine we need to add
SPN (Service Principal Name) defined in Active Directory Server associated with
the Domain Account (NAV2009) which is running the NAV Service. As we are using
Local System Account (which is a machine account) for running the SQL
Service, we do not need to define SPNs as it is not a domain user account.
To make life simpler, we have to
download Microsoft Dynamics NAV Best Practice Analyzer (BPA). It makes life so
easy to carry out three tier installation process working.
So download it from Mibuso.
Copy
to NAV Application Server. (Best Practice Analyzer will be installed on
Application Server only).
You will get a file
named bestpracticesanalyzernav2009r2.zip. Extract it using Zip / WinRAR
utilities.
Extraction process will give 2 files
which are also need to be extracted.
Best Practices Analyzer for Microsoft
Dynamics NAV 2009.exe -
This is for Microsoft Dynamics NAV 2009 SP1
Update for Microsoft Dynamics NAV 2009 R2.exe - This is the update which works fine with Microsoft Dynamics NAV 2009 R2.

First Extract Best Practices Analyzer for Microsoft Dynamics NAV 2009.exe and run the installer file.
Accept the License Agreement Terms and click Install.

Click Finish to complete the installation.

Now Extract Update for Microsoft Dynamics NAV 2009 R2.exe, select all and copy.

And Paste in the location shown below. Replace all files and folders when prompted.

Now open Microsoft Dynamics NAV 2009 Best Practice Analyzer.

Click Select option for a new Scan.

Enter the identifying label for this scan. You can enter anything in this. Active Directory Server name will come automatically and leave ServerInstanceName blank if you have only one Instance of NAV Server installed. Click Start Scanning.

Scanning may take some time depending on System performance. Click View a report of this Best Practices Scan.

Aha, we have some critical issues identified by Best Practice Analyzer. Now we will resolve each of them step by step

Let’s look at the below one first. It says Service Account (which is Domain\NAV2009 in our case) is not a database user. So to resolve this issue we need to configure Object Change Listener (OCL) on NAV Service Tier. OCL is the portion of NAV Service Tier service that checks the database for changes in database objects and make sure that Service Tier has all the updated objects to run. If you do not configure OCL then you may face following error while running RTC.

So let’s resolve below issue.

Go to Database Server (DBSrv) and open SQL Server Management Studio. Now run the following query (Make changes as per your environment):
USE MASTER
CREATE LOGIN [Domain\NAV2009] FROM WINDOWS;
GO

Select and execute following query:
USE [Demo Database NAV (6-0)]
CREATE USER [Domain\NAV2009] FOR LOGIN
[Domain\NAV2009];
Select and execute following query:
CREATE SCHEMA [$ndo$navlistener] AUTHORIZATION [Domain\NAV2009];
GO

Select and execute following query:
ALTER USER [Domain\NAV2009] WITH
DEFAULT_SCHEMA = [$ndo$navlistener];
GRANT SELECT ON [Object Tracking] TO
[Domain\NAV2009];GO

This was easy!! Let’s run the Best Practice Analyzer Scan again.
Same Process.

Click to view the scan report.

That one is gone. Great!!

Let’s look at below one, SPN is missing and BPA gives all the information including how to resolve the issue as well.

So we click Tell me more about this issue and how to resolve it.

The above error resembles the below expected SPN. So now we will create these SPN in Active Directory.

So on Active Directory Sever, run Command Prompt as Administrator and run following command. Make changes accordingly.
-S: This is used as it will create SPN
with the specified details after verifying the duplicates. If duplicate exists
then it will abort the execution of the command.
Change highlighted details as per your environment. Please make sure there is no spelling mistake otherwise it may give troubles later.

It shows SPN has been registered successfully.

Let’s run the scan again and see the result. One more is resolved!! :)

The same way we need to resolve the below issue by registering SPN for Web Services this time.

Let’s see the help again.
This resembles the below one, so let’s register SPN for Web Services.

Run the command as below (make changes as per your environment).

The SPN is registered as shown below:

Let’s run the scan again. Now only 2 Critical issues are left.

Now we need to resolve these Constraint Delegation issues. We did not take it up this issue earlier as Delegation cannot be configured until SPNs are registered (there will not be any Delegation Tab on Domain User Account). So once SPNs are registered, Delegation can be done.


So Let’s resolve above two issues by setting up constraint delegation.
Go to Active Directory Server. Open Active Directory Users and Computers (dsa.msc), and open the [Domain\NAV2009] user properties. Go to Delegation Tab and select as shown below. Click Add.

Click Users or Computers.

Enter the Database Server (DBSrv) and click OK.

Select Service Types as shown below and click OK.

Run the Best Practice Scan again. Now all the critical issues have been resolved. Below shows two warnings.

We have created SPNs for fully qualified domain names of Application Server but we are not sure whether network will resolve the system with NetBios name or DNS. So lets create SPN as shown below:


Let's create SPN as shown below:


Now run again the Best Practice Analyzer again. Finally we have resolved all the issues and warnings and NAV Server is configured with Best Practices provided by Microsoft.

Now we can install NAV RTC & Classic Client on Client System.
Run NAV setup on Client System. Click Microsoft Dynamics NAV to install.

Click Next.

Click I Accept >

Choose as per below:

Click Customize under Client.

Select as per below:

Click RoleTailored Client to configure to connect to Application Server.

Enter NAV Application Server as shown below:

Click Apply to install.

Click Close to complete the client installation.

Now open NAV Classic client.

Enter Database Server, select Database and use Windows Authentication to login. Click OK.

Let’s now open RTC


Here we go, RTC is working fine on client system.
Thanks for Reading.
No comments:
Post a Comment